

Digital Vehicle Inspections: What They Are and Why They Build Customer Trust
A plain-English guide to digital vehicle inspections (DVIs) - what they are, why they close more estimates, and how to start doing them without new hardware.
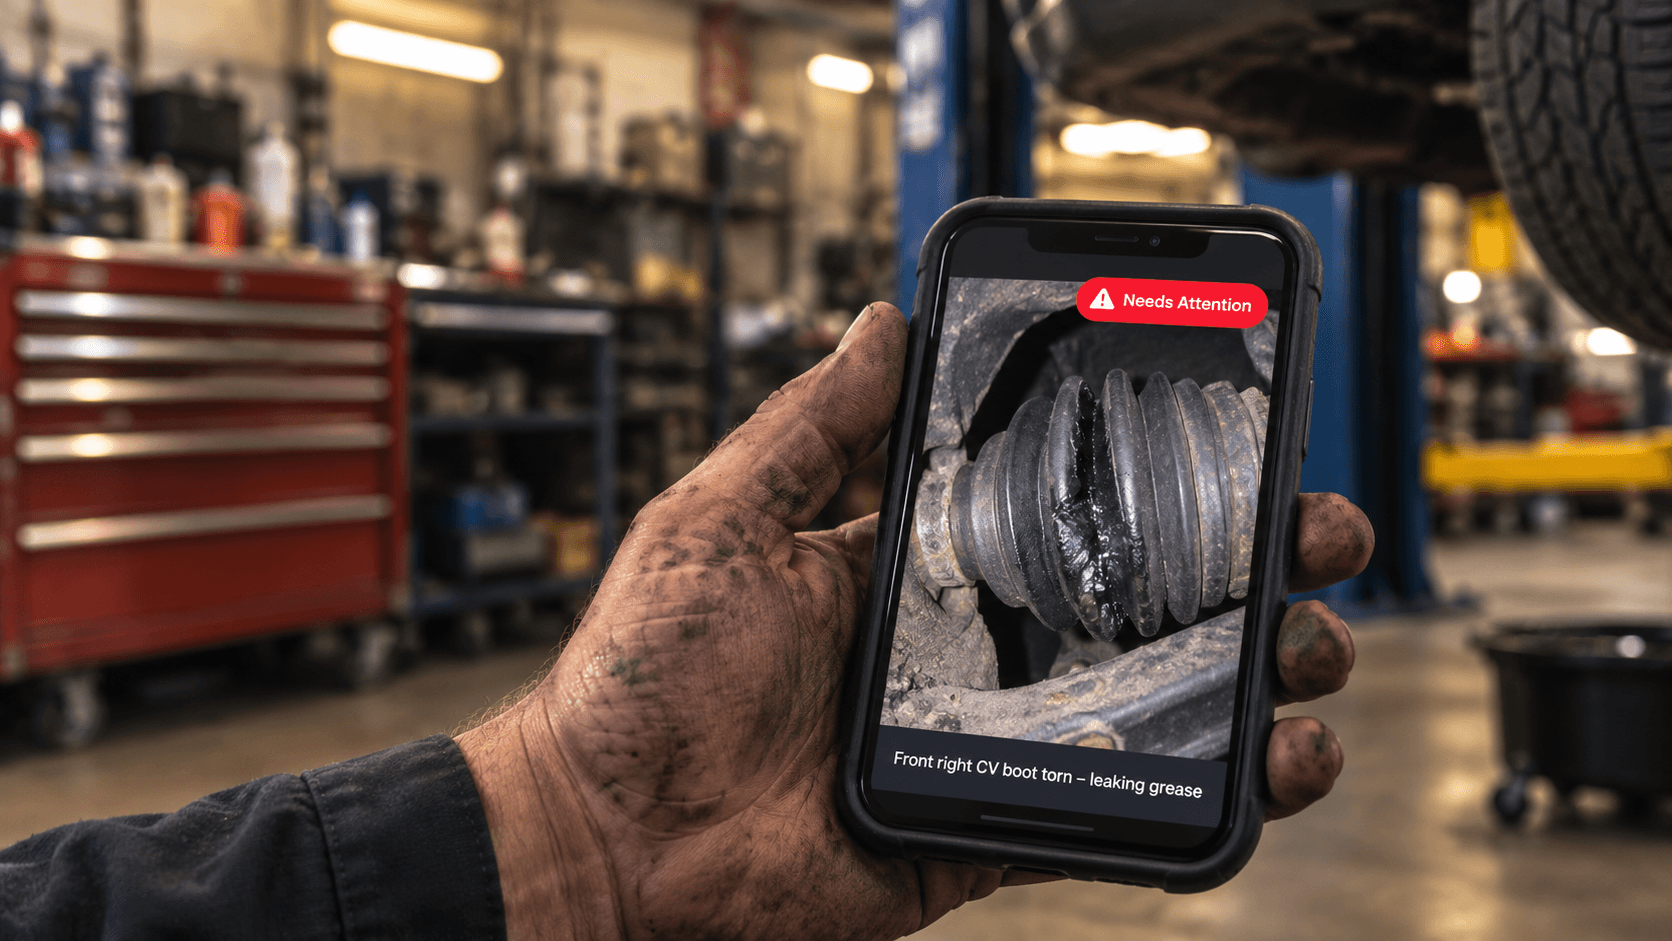
If you've worked in a shop any time in the last few years, you've heard the term "digital vehicle inspection" - DVI for short. Strip away the buzzword and it's a simple idea: instead of telling a customer "your brake pads are worn," you show them. A photo of the pad next to a coin for scale. A close-up of a cracked CV boot leaking grease. A thirty-second video of a serpentine belt that's cracking at the ribs.
It's not a new concept - techs have been snapping photos on personal phones and texting them to service writers for a decade. What's changed is that it's now built into the workflow instead of bolted onto it: the photo gets attached directly to the estimate the customer already opens to approve the work, with no separate app, no group text, no photo that gets lost when someone gets a new phone.
Why it actually moves the needle
The honest reason DVIs caught on industry-wide isn't altruism - it's that they close more estimates, and they close them faster. A customer who can see the worn part with their own eyes doesn't need to take your word for it, and they don't need to drive back to the shop to "see it for themselves" before approving the work. That's the whole objection removed in one photo.
There's a second, quieter benefit: it protects you. When a customer declines a repair and something fails three months later, a timestamped photo showing you flagged it - and they said no - is worth more than any conversation either of you remember differently.
You don't need special hardware
This is the part that trips a lot of shops up. You do not need a $2,000 inspection tablet system or a proprietary camera rig. A modern phone camera is genuinely good enough for this - the point isn't studio photography, it's clarity and context. A slightly grainy photo of a leaking CV boot, taken in two seconds under the car, does more for a customer's trust than a beautifully lit photo would if it took five extra minutes per car to get.
The part that actually matters is what happens to the photo after you take it. A photo sitting in a tech's camera roll helps nobody. It needs to land on the actual estimate, tagged with how urgent it is, and ideally with a one-line note explaining what the customer is looking at - most people can't identify a CV boot on sight, but they can read "torn boot, leaking grease, will fail if not replaced."
A simple severity system beats a wall of photos
One mistake shops make early on is treating every photo the same. Ten photos with no hierarchy just looks like a wall of concerning images, and customers can't tell what's actually urgent versus what's worth keeping an eye on. A basic three-tier system solves this on its own: something to monitor (not urgent, worth mentioning), something to recommend (should be done soon, not an emergency), and something that needs attention now (safety-relevant or likely to cause a breakdown). Color-coding it - green, amber, red - lets a customer scan an estimate and immediately understand what's optional and what isn't, without reading every note.
That's the whole system, really. Take the photo where you already are, tag how urgent it is, add one sentence of context, and let the customer see it on the same screen where they're already approving the work. Underhood builds this directly into every estimate and invoice - photos and video attach right where the customer is already looking, with the green/amber/red tagging built in, so there's no separate app for your techs to learn or a photo library to keep organized by hand.
Underhood
Want to see this workflow in your shop?
Underhood brings estimates, inspections, repair orders, scheduling, invoicing and payments together for independent repair shops.